CPS Warranty Code & Job Tracking Feature Help
Warranty Code
& Job Tracking Features (Requires Software Version 3.81 or
higher)
This feature allows a user to track each service by either Technician,
Vehicle Identification Number (VIN) and/or Work Order. In addition, the
user can choose to generate warranty codes for each service. Several
OEMs require the warranty code be submitted with warranty claims on
their AC systems.
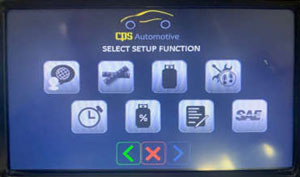
To turn on the Warranty and Job Tracking Features, access the Setup menu by selecting the gears on the main screen and the gears again. Do so will show the menu below. Press the "Job Tracking" icon with footprints, wrench, and screwdriver.
|
|

|
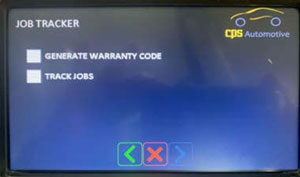
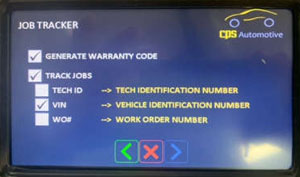
Select Both Job Tracking and Warranty
Code by checking the box as below. Then check the box(es) of how you
want the data tracked; By Technician, VIN and/or Work Order. Press
> to continue.
|
|
|
To start tracking a job, press the "Job Tracking" icon with footprints, wrench, and screwdriver.
|
|
|
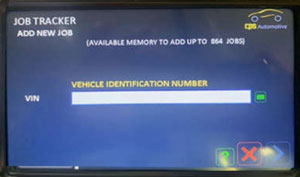
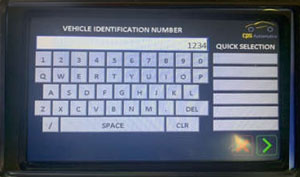
Complete the information for the method
of tracking. In this case, we have selected to track by VIN. We are
presented with this screen. The data may be entered by pressing the
green keyboard button to the right of the blank window, or scanned by
connecting a USB scanning tool to the USB port and scanning the VIN bar
code on the vehicle.
|
|
|
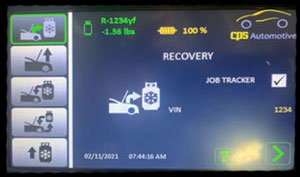
When starting the Job check the Job
Tracker box. The VIN or tracking id will be displayed.
|
|
|
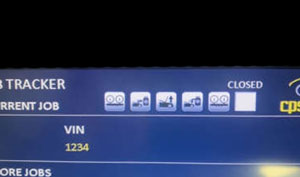
Once the job has been completed, close
the job by checking the Closed box.
|
|
|
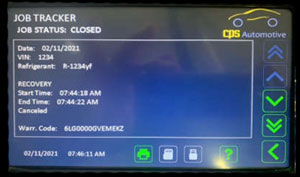
Once the job is closed it can be printed,
exported in a CSV file to the USB or SD. The Warranty code is also
printed to meet OEM requirements.
1,000 jobs are stored in the machines memory and any can be looked up
using the arrow keys on the right side of the display.
|
|
|
|