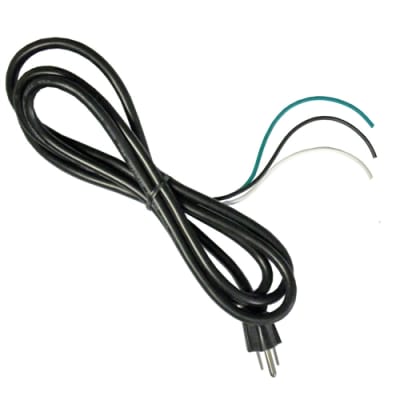
| Schumacher INC-812A Repair Parts | ||
| Part No. | Description | Qty |
| 0099000130 | Front Panel Leadset OutputConnector with Cap | 1 |
| 0099000132 | Fan Motor 115 Volt 120mm x 120mm | 1 |
| 0499000064 | Switch DPDT On-Off with IOMarking | 1 |
| 0699000340 | Front Panel Leadset OutputConnector with Cap | 1 |
| 2299001749 | INC-812A Fan Control Assembly | 1 |
| 2299001750 | INC-812A Line Filter BoardAssembly | 1 |
| 2299001751 | INC-812A Power Board Assembly | 1 |
| 2299001752 | INC-812A Control Display Board | 1 |
| 3899002537 | Positive / Negative Clamp andCable Set INC812A | 1 |
| When a charging problem arises, make certain that the battery is capable of accepting a normal charge. Double check all connections, AC outlet for a full 120-volts, charger clips for correct polarity and the quality of the connections from the cables to the clips and from the clips to the battery system. The clips must be clean. When a battery is very cold, partially charged or sulfated, it will not draw the full rated amperes from the charger. It is both dangerous and damaging to a battery to force higher amperage into it than it can effectively use in recharging. |
| *Variations of models due to production changes and parts availability are not our responsibility *No refunds on electrical components *Service should be performed only by a qualified technician *Please read all supporting documentation and safety instructions |
| Schumacher INC-812A Troubleshooting Guide | ||
| PROBLEM | POSSIBLE CAUSE | SOLUTION |
| The battery is connected and the charger is on, but is not charging. | The charger is not in char¬ger mode. | Press START/STOP button for the battery that is connected to the charger. |
| The indicator lights are lit in an erratic manner, not explained in “Using Your Battery Charger” section. | A button may have been pressed when the charger was plugged in. | Make sure nothing is touching the control panel, then unplug the unit and plug it in again. |
| “bAd bAt” in Display; CONNECTED LED lit. | The charger is in Abort Mode. The battery may be bad. | See the “USING YOUR BATTERY CHARGER” section. |
| See Aborted Charge in the “Operating Instructions” section. | This will happen if the battery did not reach full charge within 24 hours. May be due to a very large battery or bank of batteries requiring more power than the charger can deliver in 24 hours. The charger is in abort mode. The battery may also be faulty. | Reset the charger by unplugging it. Select the desired battery type again, if necessary. |
| The charger is making an audible clicking sound. | The charger has a relay that turns the current on and off to the battery. | No problem, this is a normal condition. |
| The measured current is much lower than what was selected. | The charger reached the maximum voltage and is reducing the current. | No problem, this is a normal condition. |
| The charger detected an over-temperature condition and has reduced the current to allow the unit to cool. | Make sure the char¬ger does not have the side ventilation holes blocked. Move the charger out of the sun and into the shade. | |
| The charger was unplugged from the wall but the display is still on. | The battery is supplying the power to the display. | Disconnect the battery. |
| While charging the battery, the battery stays at a certain % (ex. <65%). | The % display may not change at a steady rate. | DO NOT UNPLUG OR CHANGE SET¬TING. Be patient and let the charger finish. This is normal. |
| When the charger is unplugged or the settings are changed, the number increases or jumps to 100%. | The battery voltage is still high from a partial charge. | Wait for the voltage to settle before resum¬ing the charge. Try to charge at a lower charge rate. Turn on the lights to remove the surface charge. |
| Schumacher User Manual Link | ||